
Learn How to Self-Publish Your Book
How to Self-Publish Your Book: Create, Publish and Sell Your Book

In my How to Publish Your Book Facebook Group I get some version of this question more than any other. How do I self-publish my book? Usually, the book is written and that is as far the person has gotten. Where do I start and what do I do? This is a really big question with a lot of different answers. So let’s dive in and see if I can give you some answers.

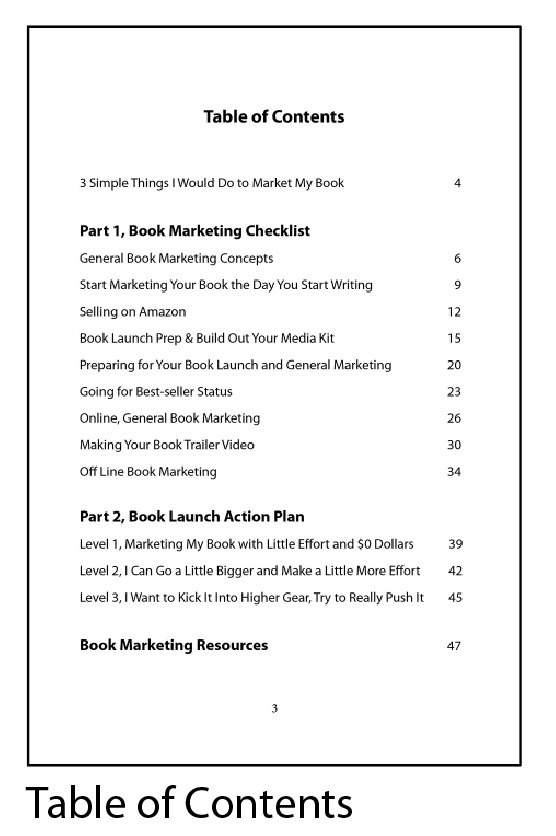
Table of Contents
Writing Your Book
1. Prep Questions
2. Writing Your Book
3. Collect Your Graphics Assets, Images, Pictures, Charts
4. Key Elements that Your Book Should Have
5. Edit Your Book
Creating Your Book
6. Creating a Kindle e-book
7. Creating a KDP/Amazon Print Book, Paperback, and Hardcover
Publishing, Launching and Marketing Your Book
8. Uploading and Publishing Your Book
9. Launch, Market, and Sell Your Book
Re-Purposing Your Book’s Content
10. Re-purposing Your Book Content for Additional Products
10. Re-purposing Your Book Content for Additional Products
1. Writing Your Book
The steps to writing your book can be varied, there are no strict rules of thumb. There are a million ways to write a book. The one you choose will be the one that fits your style. Questions you might consider asking yourself is: Is your book all text or all pictures or a combination of both? Are you writing a novel, creating a children’s book, a how-to book, cookbook, or poetry book? Whatever it is, begin by put your ideas down on paper or in a computer, creating an outline or a slurry of generated ideas. You can also dictate or record yourself speaking your ideas and then transcribe and edit. Let the creative ideas flow and build one on top of the other. You will begin to see the magic of your writing abilities take form.
However, this book isn’t about the mechanics of writing it is about publishing what you have written. There are many resources available to help you with your writing.
My advice is to write your book using a standard word processing program like MS-Word or Google Docs and keep the formatting simple. Whichever freelancer or software you work with to create your project can take that text and the images and create the book.
Some of the book writing resources that I like:
• Bird by Bird by Anne Lamott, this is a classic
• One of my favorite resources is Steven Pressfield’s blog and his books. He is a wonderful writer of fiction, non-fiction and the process of writing. Check out “The Series” area of his blog. http://www.stevenpressfield.com/ He has an entire series of excellent how-to books on writing; The War of Art, Break Through the Blocks and Win Your Inner Creative.
• On Writing, A Memoir of the Craft, Steven King
• On Writing Well, William Zinsser
• The Writing Life, Annie Dillard
• How to Write Bestselling Fiction, Dean Koontz
• The Elements of Style, Strunk and White
• Write, Publish, Repeat, Sean Platt and Johnny B. Truant, this book is a must on how to manage your writing and build a career and income from your books. This is one of the best I have read on how to structure your books to lead your readers from one book the next. I highly recommend reading this book.
• Joanna Penn and TheCreativePenn.com blog and books. Joanna is a British best-selling thriller author. Along with her novels she writes on writing, marketing, publishing and making a living as an author. Her book How to Market a Book is excellent. https://www.thecreativepenn.com/
Resources:
One of the easiest ways to get the word down is to dictate your them. You can just speak it into your phone or computer; audio or video. A great way to do this is to create a series of questions and have someone interview you. Record it, transcribe and edit. A great place to do this is while you commute in your car. You do it every day and there is no one to bother you. Both of the services below can take audio, video or just link from a video.
• Rev.com, a fantastic service for transcription, very accurate, $1.00/minute, https://www.rev.com/
• Temi.com, audio to text transcription, uses speech recognition software, $0.10/minute, https://www.temi.com/
BUY: The Self-Publishing Manual, Create Your Own Print and e-Book
• Paperback Version
• Kindle eBook Version
BUY: The Self-Publishing Manual, Create Your Own Print and e-Book
• Paperback Version
• Kindle eBook Version
2. Collect Your Graphic Assets, Images, Pictures, Charts
Some books have text only; some have pictures only. Just like with writing, you need to start collecting or creating your images and graphics. There are lots of ways to create illustrations for your book.
• You can hire an illustrator, Fiverr.com or Upwork.com are good places to look.
• You can license art from a stock photo house like ShutterStock.com, Dreamstime.com, Pixabay.com. There are many paid and free stock art and illustration sites available on-line.
• You can draw the art yourself using pen and paper, scan it, clean it up in a program like Photoshop, Illustrator and others.
• Use a drawing tablet from companies like WaCom, Huion and Ugee. Instead of drawing with a mouse on your computer screen you use a stylus and draw on the tablet. The tablet is connected to drawing applications such as Illustrator or Photoshop on your computer.
• Use can also draw using an app on an iPad, iPhone or Android device. An art/drawing app like Symmetry costs very little and the tools are powerful.
Keep in mind the image resolution requirements for black-and-white or color may vary according to the publishing platform that you chose. It is often best to involve your freelance help as early into the process as you can, as well as how you are printing and publishing. E-books are 72 or 96dpi and print books are 300dpi, black-and-white or color.
Resources: Stock Photos and Artwork Sites:
Stock Photos, Clip Art Sites
• AnimationFactory.com, http://www.animationfactory.com/en/
• ClipArt.com, http://www.clipart.com
• CorbisImages.com, http://www.corbisimages.com
• Dreamstime.com, http://www.dreamstime.com/
• FotoSearch.com, http://www.fotosearch.com/
• GettyImages.com, http://www.gettyimages.com
• iStockphoto.com, http://www.istockphoto.com/
• JupiterImages.com, http://www.jupiterimages.com
• GraphicsFactory.com, http://www.graphicsfactory.com/ a very affordable yearly fee, almost unlimited uses, unlimited downloads
• Shutterstock.com, one of my favorite sites for images, http://www.shutterstock.com/
Online Free Photos
• Pixabay.com, this site is fill with royalty free photos, vectors and art illustrations that you can use for all kinds of things. https://pixabay.com/
• Pexels.com, more free images, https://www.pexels.com/
• Unsplash.com, Free high-resolution photos, all of the photos are copyright free under the Creative Commons Zero license. Pretty cool images, https://unsplash.com/
• VisualHunt.com, a very cool site with commercial, noncommercial, public domain photos of all kinds, https://visualhunt.com/
• 99Designs Free Images, 99 Designs.com has put out a fantastic list of 30 public domain photo websites. You always need to check to be sure, but this is great place to start, https://99designs.com.au/blog/resources/public-domain-image-resources/
• Symmetry Labs drawing app for iPhone, iPad and Android, check your App store
• Article from Digital Trends, The Best Drawing Apps for the iPad Pro,
How Do I Find an Illustrator for My Book?
Finding an illustrator for your book is very similar to finding an editor. Look around your own community for a freelancer, connect with a local graphic designer, or search on line can bring great results. Are you part of a writing group, ask there? The local librarian might know because they work with a lot of local authors. You can look through sites like Fiverr.com, Upwork.com, HireAnIllustrator.com and Freelancer.
Illustrators are all over the web and Fiverr.com and 99Designs.com are two of the more popular sites to look at for freelance illustrators and graphic designers. You can look through a lot of illustrator samples, connect and get an idea of style, ability and price. There are a ton of Facebook Groups on every topic, join several and become involved and ask questions.
When choosing an illustrator, it is a good idea to send out test concepts to several artists and see what you get back. Pick a typical illustration and create a small project. Was the process easy? Did the illustrator understand the project? Did they stay on budget and time? It is well worth testing five or more illustrators on Fiverr or whatever site you select to get a feel of who will work out. One of the key questions to ask is who owns the rights to the images. You want full control over your images when you get them so that you can use them for your book and for additional products. Be sure they are familiar with the kind of book you are creating. If you end up with some cool illustrations, they might make great t-shirts, mugs and calendars.
Another place to look is on some of the stock photo sites like Shutterstock.com. You can search tons of styles and then reach out to the illustrators you like and see if they will do a freelance project. Shutterstock gives you their email addresses.
Some Tips for Working with an Illustrator or Graphic Designer
• You will need to give your illustrator or designer directions on your style or what you are looking for and what illustrations to make. To help them along, show them samples of what you like and what you do not like. You can easily search sites like Fiverr.com, the stockphoto/illustration sites, and Google Images to find tons of examples. Download your choices and pass them on to your illustrator. The more they know about your project the better the project will go.
• Be very clear on the expected goals and tasks. How many illustrations will be needed. How many rounds of changes can the illustrator do for your project. Who owns the rights to the images? Can you reuse the images? These questions are very important guidelines in communicating what is expected of each participating party to eliminate any misunderstandings later on.
• I know it doesn’t always work, but I like having people local so that I can sit with them and go over the project. I know so much is done remotely now but if you can meet face to face or use video chat, and then you can clarify a project much faster and clearer. Using services like Facebook Video Chat, Zoom.us, or Skype; it is really easy to connect with your team and act like it is local.
Common Art Requirements
• Print books, CreateSpace, Lulu, Blurb, IngramSpark, art should be 300dpi, black and white or color. With color images, IngramSpark likes CMYK, CreateSpace and others RGB. JPG for raster and eps or Adobe Illustrator for vector art.
• E-books, Kindle, color or black and white, 72 or 96dpi, I like artwork that is 900 pixels wide and 1100 pixels on the long side. Generally, an image around 8.5” x 11” at 72 or 96dpi, gif or jpg is fine. If you have image captions include them in the final art as part of the graphic.
Resources, Freelance:
• Fiverr.com, https://www.fiverr.com/
• Freelancer.com, https://www.freelancer.com/
• HireAnIllustrator.com, https://www.hireanillustrator.com/i/
• UpWork.com, https://www.upwork.com/
• 99Designs.com, https://99designs.com/
Locating a Stock Site Illustrator
Many of the stock photo and illustration sites give you the contact info for the individual illustrators. Great way to contact some you like.
• Dreamstime.com, http://www.dreamstime.com/
• Shutterstock.com, http://www.shutterstock.com/
Video Chatting Software for Connecting
• Zoom.us, https://zoom.us/ Excellent video chatting and conferencing application. Records video and audio, free and paid options. I love this service.
• Facebook Video Chat is located at the top of the FB Messenger window, look for the little video camera.
BUY: The Self-Publishing Manual, Create Your Own Print and e-Book
• Paperback Version
• Kindle eBook Version
Includes:
Part 1. Key Publishing Questions
Part 2. Writing, Creating and Publishing Your Book
Part 3. Bonus with the Self-publishing Checklist, The Top Ten Book Creating Technique and the Resource List
Available at Amazon in Paperback or Kindle
3. Key Elements that Every Book Should Have
There are no hard and fast rules on how a book should be structured but there are some conventions. There are also so many different kinds of books from novels, to how-to, to children’s, to coloring, that book parts come and go. But here are some basics in many books.
The General Structure of a Book
This one stays in all books, the left-hand page is an even page number, and the right-hand page is an odd page number. Do not change that.
• Front Cover. The most important page for your book is the front cover. With Amazon and selling on-line the front cover is often the only part of your book your reader initially sees. Does your cover tell your book’s story? Is your title clear? Does your subtitle support the question that your book solves?

Pick up a PDF version of the How to Self-Publish Your Book plus the
Book Launch Checklist and Swipe file Click Here.
Book Launch Checklist and Swipe file Click Here.
Many of our books will never be in a bookstore but instead, they will be found on sites like Amazon and our own website. We will see our books in search results and in recommendations as thumbnails. A key test for your cover is to print out your book cover at about an inch wide. Can you still read at least the title? Your subtitle maybe not, but you need to be able to see the title.
I follow a philosophy of “do not make me think” and run all my covers through this filter. You want the reader to understand the book and its title, at first glance. It may be a bit harder with a fiction book, but for any business, self-help, cookbook, etc. you want to be clear. What I find with a lot of authors when I work with them on their covers is that sometimes the subtitle is really the title. Just switch them and you are fine. A key tip here is to not fall in love with your working title because it might be wrong. I usually wait until the end of the bookmaking process and then finalize the title. Very often our working title, the one that we have been talking about for the three years that we have been working on the book really only means something to us and very little to our audience.
Spend some time looking at books in your category. This is very easy to do on Amazon.com. There is often a common theme that runs through a particular genre. Cookbooks have pictures of the food on the front. Biography books have a picture of the subject of the story. Fiction books usually have a full cover photo or illustration. Business books often anchor the front cover with a picture of the author, creative text or a combination of both. You get the idea; see how your book fits. You can break these conventions but it is good to know where you can start from.
Another test that I do is to open up a page on Amazon of the competing books in my subject area. Make a thumbnail cover image and drop it over the top of one of the books. Does my book stand out from the other books? Do I see it in the collection of similar books? If yes, great. If no, then fix it.

• Page 1. Title Page, repeats what is on the front cover. Often mimics the basic design of the front cover. The title page should include the title, author name, maybe your web address and sometimes the copyright notice. With Kindle books, your web address or your Amazon Author Central web address can be live links. These links are often accessible from the “Look Inside” feature on Amazon and from your Kindle reader. Using live links within your e-book is a great way to pull people into your sales funnel without them even purchasing the book.

• Page 2. Left-hand disclaimer and legal page. This is the page behind the title page. This is where you put your disclaimer information, including your copyright info. You can also include any publishing info, contact info, web address, etc.
On the next page is some sample copy to give you an idea what I am talking about. Not all books need all of this. I am also not a lawyer and you should check with an attorney if you have any questions. But some version of this is in every book.
Resource: Sample Book Disclaimer Text (feel free to customize this disclaimer text)
Disclaimer:
All rights reserved. No part of this book may be reproduced or transmitted in any form or by any means, electronic, mechanical, photocopying, recording, or otherwise, without the prior written permission of the publisher. For information, contact Publishing Company Name. Reviewers may quote brief passages in reviews.
Notice of Liability:
The information in this book is distributed on an “as is” basis, without warranty. While every precaution has been taken in the preparation of this book, neither the author nor Publishing Company, shall have any liability to any person or entity with respect to any liability, loss, or damage caused or alleged to be caused directly or indirectly by the information or websites contained in this book.
Trademarks:
Throughout this book, trademarked names are used. Rather than put a trademark symbol in every occurrence of a trademarked name, we are using the names only in an editorial fashion and to the benefit of the trademark owner, with no intention of infringement of the trademark. Where those designations appear in this book, the designations have been printed in initial caps.
Websites and Ideas:
The Internet is a fluid changing medium and websites change all the time. All links are for information purposes only and are not warranted for content, accuracy or any other implied or explicit purpose.
The ideas express in this book are my own and there are no guarantees that you will have success with them. This book is intended to be informational and is my opinion only. Please consider leaving a review wherever you bought the book or telling your friends know about it.
© Copyright Your Name 2018, All Rights Reserved
Published by you or your company name
Phone number or contact;
http://www.PublishingCompanyWebsite.com
Amazon Author Central Page
http://www.amazon.com/author/authorname/
• Page 3. Right-hand page. Table of Contents should go here and be descriptive. This is a key page. Your table of contents is your books list of benefits. You do not want to use Chapter 1, Chapter 2, etc., but instead you want descriptive titles that tell the story of your book. Amazon’s Look Inside feature usually will show the Table of Contents (TOC) so you want it to work for you. The Table of Contents could be placed on page 5 also; it just needs to be close to the front and on the right.
• Page 4. Left-hand page. Good place for your books intro, or acknowledgments, often referred to as front matter content. Ok so here is where people differ on the order of the pages and what to include. Traditionally all of this is considered the front matter, like the introductions or quotes about the author, acknowledgments go right upfront. Now a huge number of books are sold online and we never actually physically pick the book up to look inside. One of the major tools for promoting and marketing your book on Amazon is the “Look Inside” feature. Clicking on a cover on Amazon’s sales page gets you the first few pages to view of the chosen book. The problem is you do not know how many pages you will get for instance a coloring or children’s book may only offer a few pages, however, with a big novel it can be a lot of pages.
What I like is to get the reader to view my good stuff as quickly as I can. Promoting my love for my spouse isn’t selling my book. That is why the Table of Contents is so important, it can sell the book, it is the book’s outline. Get people to the good stuff in my opinion. Although I have mixed feelings about all the fun quotes and drawn out intros. The placement of this information is up to you, of course, but some of this stuff can be placed in the back pages of your book, or on your website, or on the back cover.
• Page 5. Wherever these pages actually fall, Chapter 1, your content, is where you begin your book.

• Page 6. Back of the book. Back matter is considered as the last informational page in a book that tie off the introduction of the book, sort of like credits at the end of a movie. Add an author bio along with a photo and contact info. If it fits for your subject add a resource list at the back of the book, also add any additional info that might apply to your book. An index, for example, would be considered any additional information that your reader might need. If you offer programs or consulting, drop that in also, give readers a call to action.
• Last page in the book. Drop-in an ad where people can learn where to buy the book, give the page a call to action, for example, XYZ book is “available at Amazon.com” or “Other books by Author Name, available at Amazon”. If you have a series of books put a book catalog page with all the cover thumbnails at the back. Your reader may not know you have other books. Cross-promote your books in each one of your books. I have books that sell multiple copies to the same reader. Make it easy for your reader to recommend your book, or purchase another copy.
• Back cover of the book. Remember printed books all have back covers. On Amazon, we usually just look at the front cover and the Look Inside feature but the back cover is there also. Amazon usually shows the back cover in the little thumbnail images that fall just below the main book’s image on the book’s sales page. They also show up as one of the pages in the Look Inside section. Sometimes we actually have the book in our hands and want to turn it over and show people.
• What to Include on the Back Cover? The title, maybe a quote of praise, a descriptive paragraph, three or four bullets pulled from the table of contents, a short bio about the author with a headshot, and your publishing info. The publishing company, website, I like repeating the copyright info here and maybe your contact info. Usually on the right is the ISBN number bar code, usually applied by CreateSpace or IngramSpark.com.
Kindle books do not have back covers, what do I do then? You can still put this info at the back of the book or some version of it. I would especially put a list of your books with live links directing the reader to Amazon to learn more.
• Spine. If your book is over 135 pages you can add text to it. In reality, anything over 100 pages is thick enough to add text to for Kindle. The KDP Cover Creator you need to have 131 pages. I use 135 pages as a general page count. You will want the spine to be thick enough to hold the type comfortably.
BUY: The Self-Publishing Manual, Create Your Own Print and e-Book
• Paperback Version
• Kindle eBook Version
BUY: The Self-Publishing Manual, Create Your Own Print and e-Book
• Paperback Version
• Kindle eBook Version
4. Edit Your Book
One of the most important things you can do for your book is to have it edited. This is one of the most common negative comments left in the Amazon review area for self-published books, poor editing or none at all.
There is copy-editing, line editing, proofreading, and development editing.
• Copy-editing corrects the spelling, punctuation, and typos.
• Line editing goes into the structure and flow of your book as well as grammar, spelling, and punctuation.
• Proofreading is usually done at the end after everything is laid out and almost ready to publish. It catches all those last-minute errors and inconsistencies.
• Development editing; most self-publishers do not do this but you can. Developmental editing helps you begin the book, and structure the content. It reduces redundancies and duplicate information, provides storyline consistency, and that proper storytelling tropes are being used in regards to the genre you are writing in. You also secure the plot and resolve any holes. Developmental editing may be one of the most crucial elements of the types of editing services offered.
You have basically finished your manuscript and you are now ready for it to be edited.
How Much Does an Editor Cost?
That is a pretty open-ended question. It depends on the kind of book, how many words, what state the manuscript is in. It is really hard to put a general figure on this, but somewhere between $500-$1,200 give or take a bunch. Many editors are in the $35-40/hour range at 8 pages per hour average, depending upon the service required. Proofreading is in the $25-35/hour at 10 pages per hour. Some charge by the word or by the page, and are you doing line editing, copy-editing or proofreading. If you can find a local English teacher or reporter who is working freelance on the side it might be on the lower side. If you are going with a professional editor it will be much higher. Either way, it is worth it to have a better book.
Some of the print-on-demand sites also sell editing packages and these look like pretty good places to start for information about what an editor does.
How Do I Find Someone to Edit My Book?
Ideally, you want someone you can work with and is familiar with your type of project. Are you doing a novel or a business book or self-help book? If you have chosen to publish a cookbook, then you might want someone who knows cooking. If you have the budget, look for someone who will understand your type of project. Locally you might find an English teacher or local reporter that is picking up some extra cash. This might give you just a general person who can do an overall edit of your book.
You can also look at freelance sites like Upwork.com and Fiverr.com. Understand though that the person might be outside the country and also, doesn’t have a full grasp of your language or style. If you use a freelance site like Fiverr, test your prospects. Send some sample copies to five different editors and see which one does the kind of job you are looking for.
Resources, Editing:
• Some great tips from Joanna Penn of the CreativePenn.com on how to find an editor. https://www.thecreativepenn.com/2014/07/14/how-to-find-the-right-editor/
• Editorial Freelance Association, Excellent source of info on finding editors and giving you an idea of how much to pay and the process. https://www.the-efa.org/rates/
Resources, Software tools:
Editing has also turned to on-line web-based tools and there are many applications that can help with the editing or for preparing the first pass on your manuscript to get it ready for the editor.
• ProWritingAid.com, https://prowritingaid.com/
• Grammarly.com, https://www.grammarly.com/
• AutoCrit.com, https://www.autocrit.com/
• SmartEdit.com, http://www.smart-edit.com/
BUY: The Self-Publishing Manual, Create Your Own Print and e-Book
• Paperback Version
• Kindle eBook Version
BUY: The Self-Publishing Manual, Create Your Own Print and e-Book
• Paperback Version
• Kindle eBook Version
5. Pre-Edit Printed Proof
I think this is so important I make it a step all by itself. This is a technique that I use and recommend all the time to authors. You have pretty much finished the manuscript and have maybe gone through some basic editing. The book is just about ready to move to the full editing and layout stages. The task is to create a physical version of your book, including a rough cover. You will see things on paper that you never see on the computer screen. This also makes a great proof copy to send to the editor. A physical proof will start getting you excited about your upcoming book. It is really going to happen. There is something about touching and feeling the turning of the pages, that gets us to completion.

A. Create a pdf at the correct size of your book. You will need to change the document size in Page Setup in MS-Word. In the File pull-down menu change the standard page size to maybe 6” x 9” or whatever your book final size is. Save the file as a pdf and print it out. Also, be sure to change the page size in the print menu, otherwise, it will print at 8.5” x 11 and will not look correct. I usually take this pdf file to Staples or OfficeMax and have them print it out. Try to print pages back to back, even if it comes out at 8.5” x 11 that is fine. The goal is to have a printed version of your book.
B. Print the book out and have a spiral binding put on it. Be sure to put a cover on it, even if it is just the book title. I also put the clear plastic front and black plastic back on the book. Staples can do all this. Make it look like a book.
C. Review the physical paper proof, do any of your own edits and once those are updated, you are ready to send off to a real editor.
D. Edit the book. You can have an editor target a specific area if you feel it is needed more than others, for example an editor can provide copy-editing for spelling and grammar. Or keep it simple and just proofread for spelling and consistency errors. You can also go deeper with a line editor. But all books need some editing.
E. Update your book. After your book is formatted and laid out, but before publishing have it printed out for review again and re-edit again. You might just need a Proof Editor at this point.
Resources, Freelance:
• Fiverr.com, https://www.fiverr.com/
• Freelancer.com, https://www.freelancer.com/
• HireAnIllustrator.com, https://www.hireanillustrator.com/i/
• UpWork.com, https://www.upwork.com/
• 99Designs.com, https://99designs.com/
• Editorial Freelancers Association.org, https://www.the-efa.org
Note that editors will only make suggestions regarding the content of a book, the author has complete control over how they want their content to be presented. You, as an author have the final say and no one else. An editor will also be watchful as to not alter the author’s voice or heartbeat of a story. It is crucial to keep the authors' work as close to the style in which the author wants the book to be presented. An editor is also human and cannot guarantee complete accuracy. They do, however, strive to provide the best they can, as with everyone, oversights and missed errors can and do happen. Remember to be patient and be kind to your editor even if you disagree.
BUY: I Want to Publish My Book But I Don't Know How
• Paperback Version
• Kindle eBook Version
BUY: I Want to Publish My Book But I Don't Know How
• Paperback Version
• Kindle eBook Version
6. Different Options for Publishing Your Book
There are primarily six options for self-publishing your book, an e-book, a physical printed book-both of which are sold just on-line, a printed version of your book that you sell in bookstores, a quick print stapled version that you might give away, a PDF book that you can sell on your website and maybe an audiobook. Inside each of these are different formats and binding options.
A. E-Book. When we say e-book we usually think of a Kindle book, sold on Amazon. Kindle books are usually created using MS-Word and are read using a Kindle reader or app. The Word file is saved in HTML or Mobi formats and uploaded to Amazon. But there are also other kinds of e-books that use the E-pub format and a wide variety of e-book readers. These are distributed through sites like Barns & Noble with the Nook, Apple iTunes, Kobo, Sony and many others. There are approximately 80 or so publishing platforms for e-books. E-books can also be created as pdf files and sold off your own and other sites. Kindle and E-pub books have two parts to upload to their publishing platforms, one is the interior file where your main body content is and the second is the cover file.
• Barnes & Noble Press, formally Nook Press, a new, revised publishing platform from Barnes & Noble, now offering print and e-book options https://press.barnesandnoble.com/
• Smashwords.com, https://www.smashwords.com/
B. A paperback print book. For this format, we use a service of Amazon.com called KDP.Amazon.com. KDP, formerly crosspiece, is the print-on-demand self-publishing side of Amazon.com. Someone orders a book on Amazon and the individual book is printed, packed, and shipped to the customer. Amazon collects the money and drops it into our bank account. KDP is a fantastic service. We create the book’s interior and a cover; save both as a pdf file, upload them to KDP and we are a published author on Amazon. There are other companies also with many other ways to publish your book; including hardcover, spiral, saddle stitch (staples), audio and even video. Publishing with Amazon’s KDP platform puts your paperback book in their on-line store and their expanded distribution system. Using a company like IngramSpark.com you can also take your book to bookstores and worldwide distribution.
Resources:
• KDP.Amazon.com, Paperback, https://kdp.amazon.com/en_US/
• Lulu.com, Paperback, spiral, staple, hardcover, https://www.lulu.com/
• Barnes & Noble Press, formally Nook Press, a new, revised publishing platform from Barnes & Noble, now offering print and e-book options, https://press.barnesandnoble.com/
• Blurb.com, Paperback, hardcover, primarily photo and art books, http://www.blurb.com/
• IngramSpark.com, Paperback, hardcover, http://www.ingramspark.com/
• Bookbaby.com, Print and e-book, https://www.bookbaby.com/
C. A book you can sell in bookstores. I am not recommending this route yet. You are just getting started but you might have the question of how do I get my books into bookstores. One of the negative sides of KDP.Amazon.com is that they do not really sell to bookstores. Bookstores do not order from them because you cannot return the books that do not sell like you can with a traditional distributor. To be in the distribution bookstore system we would need to look at IngramSpark.com. Ingram is the largest bookstore distributor in the world with 39,000 outlets. They are very similar to CreateSpace’s, print-on-demand platform including similar formatting and uploading specifications. The difference being, Ingram works with stores. They also work with on-line print-on-demand stores and e-book stores. Do not go this route until you have published a couple of books and are ready to start acting more like a publisher. IngramSpark also has some fees, whereas KDP does not.
What most people do is options A and B, a Kindle e-book and/or a KDP print book. I recommend doing both of these. It doesn’t matter a whole lot which one of these two applications you do first. If you time it correctly, you can launch both formats at the same time. A Kindle e-book is usually the route most authors go for a best-seller book launch because they can price the book at $.99. It makes for an easy sell.
A few people in my Facebook author group, How to Publish Your Book, have started using IngramSpark.com and spreading their books beyond Amazon. It takes a bit more work and a little money to cover the fees. If you want to be in stores, you need to be with IngramSpark.com. There are also other options for publishing your books, such as a quick-print book, which is great for a handout or a book to be left in the lobby of your business. You might consider using a PDF book as a lead magnet to give away or sell from your website. What I try to avoid is having a garage full of books. With the great print-on-demand options today there is no need for inventory or the author shipping their books.
Resources:
• IngramSpark.com, Paperback, hardcover, http://www.ingramspark.com/
• Lulu.com, Paperback, hardcover, distributes to Ingram, https://www.lulu.com/
D. PDF book. One of the cool things you can do with your book is that it can also be turned into several other products that you can sell or give away. You can use the PDF you already have from the printed version. The same file can be given away or uploaded to a site like Gumroad.com or Sellfy.com and sold from your website. You can also use it as a lead magnet to get people to sign up for your email list. Attach it to one of the autoresponder reply emails.
Along with selling them yourself, you can also distribute them through PDF Digital Publishing Platforms like Scribd.com and Issue.com
Resources:
• Gumroad.com, perfect for any kind of digital file that you want to sell online, https://gumroad.com
• Sellfy.com, https://sellfy.com/
• Scribd.com, a PDF publishing site, kind of like YouTube for pdf files, https://www.scribd.com/
• Issue.com online publishing, magazines, heavy into fashion and style, https://issuu.com/
F. Audio Book. Record your book and turn it into an audiobook, or a podcast for Apple iTunes, SoundCloud or Stitcher. Each chapter is an episode. Your book is a readymade series just waiting to be broadcast. Each chapter can be recorded using desktop gear or at a studio and you now have the material for an online course, with a PDF bonus book. It can all be the same content just in different formats. Turn each chapter into a blog post. One advantage of blogging a book is that Google will bring you an audience and by looking at your stats you will see what part of the book is resonating. Once you know this, you can start expanding that chapter into the next book.
• ACX.com is like KDP but for audio. It is a division of Amazon and handles their audiobooks. The books themselves are sold through Audible.com. You can create your own or hire a professional reader for your book.
Resources:
Publishing as an Audio Book
• ACX.com, where you go to create an audiobook for selling on Amazon, http://www.acx.com/
• Findaway Voices, an alternative to ACX and a way to create and distribute audiobooks to multiple retailers. Great for indie authors. https://findawayvoices.com, they have an excellent Help page which describes the process, https://my.findawayvoices.com/help-and-resources
Publishing as a Podcast
Distributors
• iTunes, https://www.apple.com/itunes/ Main podcast site
• Stitcher.com, https://www.stitcher.com/ radio shows and podcasts, phone and tablet
Hosting
• Libsyn.com, https://www.libsyn.com/ complete podcast hosting and publishing platform
• SoundCloud.com, https://soundcloud.com/ on-line audio distribution platform for audio in all formats, podcast hosting
The key here is to deliver your book in as many formats as you can to as many readers as you can. How does your audience want their books delivered? Figure out how and do it. Primarily though it is usually an e-book with Kindle and a print paperback book with CreateSpace, but also PDF and audio.
Check out my entire course on writing, designing and publishing your print or e-book. I go into much greater depth on creating books, How to Publish Your Book, click here, https://bruce-the-book-guy.usefedora.com/p/how-to-publish-your-book/
Creating Your Book
You have finished writing and editing your book now it is time to lay the text and graphics out, format and publish it.
How Do I Find Someone to Format and Lay the Book and Cover Out?
Designing and or formatting your book is key to the project. Just like with finding an illustrator or editor, finding a graphic designer or the layout/format person is the same. Ask around, Google; CreateSpace or Kindle, InDesign book layout person or go to the on-line sites like Fiverr, UpWork, or 99Designs. You might also contact your local community college. They all have design programs with students ready for a project. You can also do it yourself, it isn’t all that hard and once you get the publishing bug you can create all kinds of books.
Some Tips for Working with an Illustrator or Graphic Designer
• You need to give your illustrator or designer directions on where to go and what to make. To really help them along, show them samples of what you like and also, what you do not like. You can easily search sites like Fiverr or the stock photo/illustration sites and find tons of examples. Download them and pass them on to your illustrator. Go to Amazon and look at book covers and access the “Look Inside” feature to review inside design. Go to an actual bookstore and walk around. I do this all the time when I design a book cover. Screen capture or give your designer the names of the books you like. The more they know about your expectations and direction the better and easier the project will go.
• Be very clear regarding the goals and tasks you need to be done for your book. What is the look and feel of the book? How many illustrations, charts, and graphics do you have or will you need. Charts and graphics can take 1-2 hours each to make so you want to know you have the correct person. Check with your designer; how many rounds of changes can you do for the price you are paying. With your illustrator, ask who owns the rights to the images? Can you reuse the images; these are all important questions?
• I like to have people close so that I can sit with them and go over the project. I know so much is done remotely now but if you can meet face to face or video chat you can clarify a project much faster and clearer. Facebook video, Zoom.us, and Skype, all work great for having a conference call. Zoom and Skype both have screen share and this can be very helpful when working with your designer. Using Skype or Zoom and screen share can be very helpful when doing corrections. Your designer gets to see what you are talking about.
Resources, Freelance Help:
• Fiverr.com, https://www.fiverr.com/
• Freelancer.com, https://www.freelancer.com/
• HireAnIllustrator.com, https://www.hireanillustrator.com/i/
• UpWork.com, https://www.upwork.com/
• 99Designs.com, https://99designs.com/
BUY: The Self-Publishing Manual, Create Your Own Print and e-Book
• Paperback Version
• Kindle eBook Version
BUY: The Self-Publishing Manual, Create Your Own Print and e-Book
• Paperback Version
• Kindle eBook Version
7. Creating a Kindle e-Book
Books are created in two parts, the inside where the content is and the cover. We need to make both.
A Kindle e-book is kind of like a large text document. Most authors’ in-fact just use MS-Word to write their book and also to format it for Kindle/Amazon. The key to a successful Kindle book is to keep the formatting simple and not to over-design. Do not get fancy with all kinds of design ideas. Stay away from tabbed charts and overly formatted files. Kindles are simple documents, think web page from 1996. Generally, for fonts use either Arial or Times Roman. The reader can change the font to whatever is in their Reader. You can also add images and your live HTTP web links to your book. Charts can be a real pain so make them a graphic instead of using the table feature of MS-Word. If you have images with captions, make the captions part of the graphic itself not part of the text. Otherwise, they can end up on different pages when someone is reading the book. Kindle files expand and shrink to fit the device the reader is using. On a smartphone the screen is small, on a tablet, it can be big. The document flows to fit the shape.
Most authors use MS-Word to format their books, but you can also use other word processing applications such as Google Doc, Pages, or Scrivener.
Kindle Create
Kindle Create is a brand-new book creation program from Amazon for creating traditional e-books. The app allows you to open an MS-Word file and format the copy in one of several templates. It also helps you build an active Table of Contents, which has always been a challenge. It can work with Microsoft Word, Apple Pages, and Google Docs. You just need to be able to export a doc(x) file from your writing program.
This app can also accept pdf files to create picture books. It is very similar to Kid Creator. A really cool feature is that it can create a Table of Contents, something we couldn’t do before with the earlier versions. The Kid Create or Kindle Create for pdf files does not have the fluid flow that a Kindle book has, the pages are fixed, but it does a great job of converting each pdf page into a Kindle page and it is really fast. I highly recommend it.

My best advice for a clean, workable book is to start with a clean document. Most books are written in bits and pieces, often on several different computers. The MS-Word file tends to get filled with lots of junky formatting. Before starting to shape your book, take your existing document, save it as a text file and strip out all the old formatting. Copy this new cleaned text file into a new MS-Word doc and work from that. Use styles and global formatting from the Format pull-down menu to format your document. Insert graphics instead of copying and pasting them into your document.
There are several excellent books on formatting your Kindle file on Amazon. If you pick a freelancer just be sure they have formatted Kindle books before.
A pretty good book for setting up and formatting your Kindle document from MS-Word is, Word to Kindle by Aaron Shepard available at Amazon
The Kindle works great on books that are all text or text and a few images. If you have a heavily designed book like a cookbook, a how-to book, a children’s picture book, or any book with a lot of images, captions, columns and such, then the traditional Kindle will not work as well, especially if you try to duplicate the look of that book in the e-book file. For that kind of book, Kindle has Kindle Kid Creator and now Kindle Create that can take the pdf for that book and convert it to a Mobi file for Kindle. They also have apps for Comic books, Graphic Novels, and Educational Textbooks.
Resources:
Kindle Books
Kindle has a variety of apps to help you create e-books and illustrated graphic books. The apps work with PC and Mac
• Kindle Create, a new app for creating Kindle e-books and converting pdf files to Kindle digital format. You can format MS-Word files, style, update, and build a TOC. This new app also has different themes that you can access. It can import PDF files, move them around and build a TOC. The application can also import audio and video files and add them to the pdf. Great for creating an interactive book. https://kdp.amazon.com/en_US/help/topic/GHU4YEWXQGNLU94T
• Kindle Kid Creator, great for creating books with illustrations, import PDF file, jpg, png, tiff. Add pages and text to imported PDF files. https://kdp.amazon.com/en_US/help/topic/G201562880
• Kindle Textbook Creator, create and publish educational material for Kindle devices and reading apps. Convert PDF file of existing textbooks, study guides, reference material. You can include audio, video, hyperlinks and image popups. https://kdp.amazon.com/en_US/help/topic/G201642070
• Kindle Comic Creator, the original Kindle app, designed for graphic novels and comic books. Support for panels, imports, PDF, jpg, png, and tif formats. https://kdp.amazon.com/en_US/help/topic/G200735480
Kindle Formatting Guidelines for Inside Your Book
I have included some basic formatting guidelines to help get you started with your Kindle book. Note that some of these will change with the new Kindle Create application. An overriding guide for Kindle books is to keep the formatting simple. They are not like fully designed InDesign books. Keep it simple and your book and the formatting will be great.
Basic Guidelines for Kindle Books
• Keep your formatting simple
• Produce a clean, basic document
• Use Paragraph Formatting for global layout and spacing
• Work in a standard 8.5 x 11” document
General Formatting Guidelines
• Avoid tabs and spaces for indenting paragraphs
• Use Paragraph Formatting to adjust indents
• No headers or footers
• No page numbers
Paragraph Guidelines
• Do not use Returns between paragraphs
• Use Space Before and Space After for spaces between paragraphs
• Use Page Breaks between chapters
• Insert images “from file” do not paste
Text Guidelines
• Format Chapter Heads with MS-Word style features. Use H1 Head and H2 Subheads
• 12 points for text, 14-18 points for heads
• Use Arial/Helvetica, Times Roman or Georgia for fonts
Type Style Guidelines
• Bold, italic or underline use format font menu, the formatting palette or the toolbar
• Turn charts and graphics into artwork
• Add live HTTP web links to your book
Image Guidelines
• Every Kindle is a different size. Pick an image that works in the middle.
• Use color RGB images
• The author pays for download, be efficient with images sizes
• Avoid charts and tables, turn them into .gif graphics
Image Size Guidelines
• Amazon recommends a picture ratio of 9:11
• Pictures 900 x 1100 pixels, 9:11, old standard was 600 x 800 pixels, 3:4
• Kindle Fire HD 8.9 display 1920 x 1200, 16:10
• At 72 dpi 12.5” x 15.77” inches
• At 300 dpi 3” x 3.66” inches
• Kindle processes, .gif, .png, .bmp, jpeg files
• Kindle book format supports .jpeg and .gif
• 300dpi or 72dpi or 96dpi image resolution
• Up to 5mb per image, I find this way too big, keep under a megabyte
Bottom Line for Picture Sizes
• Pictures 900 x 1100 pixels, 9:11
• Old standard 600 x 800 pixels, 3:4
• 300dpi or 72dpi, gif format
At 72dpi, 12.5” x 15.75”
At 300dpi, 3” x 3.66”
Color
.gif or jpg format
When you have completed the formatting, you will save your book as an html file. This is done from the MS-Word Save As Menu. Be sure to download the Kindle Preview tool from KDP Direct and run your html file through it. It will show you how your book looks on several of the Kindle devices. They also have this tool on the Kindle upload page. You can use it there, after your book is uploaded but before being published. It is very helpful. You can upload your book, review it, make changes and then upload another version until you are comfortable with it.
Kindle Cover Guidelines:
• Longest side of your cover must be minimum of 1000 pixels, shortest side 625 pixels, or 13.8” x 8.7” at 72 dpi. Ideally the height/width ratio is 1.6:1.
• For best quality Amazon recommends a height of the cover image be at least 2,500 pixels. Ideal dimensions for cover files are 2,560 x 1,600 pixels at 72dpi.
• I like covers at 9” tall x 6” wide at 300dpi or 2700 pixels x 1800 pixels
• Files should be in RGB format and saved as jpg or tiff files.
• File must be less than 50mb is size
For your e-book Kindle cover you will need to create a separate jpg file with just the front cover. No back cover. This file should be a jpg document.
Kindle has an on-line Cover Creator tool on the Kindle upload page that you can use if you do not have one created. Canva.com also has some great free Kindle templates that you can use to make a cover. PowerPoint can also work well to create a cover, set your page size to 6” x 9” and export the file as a jpg.
Once your book has been laid out for print or formatted for Kindle it is time to have a final proof reading done. Make sure everything is good.
Resources:
• Kindle, https://kdp.amazon.com/en_US/
• Kindle Help, tons of info here, https://kdp.amazon.com/en_US/help
• Aaron Shepard has a variety of books on creating Kindle books, they are all pretty good. A good place to start, From Word to Kindle: Self-Publishing Your Kindle Book with Microsoft Word, or Tips on Formatting Your Document So Your E-book Won’t Look Terrible, http://amzn.to/2C6QTJ5
And from Amazon, both books are excellent
• Kindle PC, Building Your Book for Kindle
• Kindle Mac, Building Your Book for Kindle Mac edition
On Canva.com Check out the Kindle Cover Templates
https://www.canva.com/
To Find Book Cover Ideas
A. Review books on Amazon and in stores for covers that you like; they can be used for inspiration and as a guide for the cover designer.
B. Find a local freelance designer to design and layout out your cover.
C. Test several ideas and titles with associates. Facebook is a great place to test different cover options. Upload a graphic with covers A, B and C. Ask people to choose.
D. If you are going to publish your book on Amazon then do the Thumbnail Test. Reduce a graphic of your cover to thumbnail size, around 1.5” wide and be sure it is readable. If you are going to print at a local quick print shop, have a mock-up made for review.
We do judge books by their covers. Your reader should know at a glance what your book is about. I follow the “Don’t Make Me Think” philosophy of usability author Steve Kruge. Your book title should be clear and convey what your book is about without any confusion. If you need to give more clarity to your book then use a subtitle. Subtitles are a great way to add in some important keywords and description to your title. Also, add your author name to the cover. To help with design and layout ideas, look at similar books in your market. Amazon is the perfect place to do this. You can also search Google for book cover designs in the Google Image Search in your genre and you will see hundreds of cover ideas. Type into the Google search box something like “Book Cover ideas for Sports Books”. Then choose Images from the menu options and you will see hundreds of ideas.
There are many services that can help you produce a compelling cover. You can contact a local graphic designer, use on-line services like 99Designs.com and Fiverr.com, Go to Canva.com and access their templates. Many of the book publishing print-on-demand sites also offer design and editing packages.
Resource, Design:
• Canva.com, a free and subscription on-line graphics program. Check out the Kindle Cover Templates, they are excellent. Great resource for make social media and many other graphics. https://www.canva.com/
Freelance Resources:
• Fiverr.com, https://www.fiverr.com/
• Freelancer.com, https://www.freelancer.com/
• HireAnIllustrator.com, https://www.hireanillustrator.com/i/
• UpWork.com, https://www.upwork.com/
• 99Designs.com, https://99designs.com/
BUY: The Self-Publishing Manual, Create Your Own Print and e-Book
• Paperback Version
• Kindle eBook Version
BUY: The Self-Publishing Manual, Create Your Own Print and e-Book
• Paperback Version
• Kindle eBook Version
8. Creating a KDP/Amazon Print Book, Inside and Cover
KDP.Amazon.com is the print-on-demand side of Amazon. It is full on publishing. To publish a book, you need two pdf files, one for the interior and the other for the cover. You can do it yourself or locate a local freelancer or an on-line service like Fiverr.com or 99Designs.com to design and lay your book out for publishing. Books are usually created with Adobe InDesign but MS-Word, Apple Pages or PowerPoint can work also. Really, any program that can generate a pdf file will do the job.
KDP has a wide variety of book sizes that you can print. From 5” x 8” to 8.5” x 11”, black and white or color. If you use any color anywhere in your book that means all of the book is considered color for printing purposes. I usually pick Industry Standard Sizes but there are others that are fun like the square format.
• Minimum page count is 24 pages.
• Margins should be 1/2” all around, stay away from bleeding images off the page unless you know what you are doing.
• Images need to have a resolution of 300dpi, or dots per inch.
• Black and White or Color is fine
Once you have selected a size you will then need to lay the book out in a program that can format the text and graphics and generate a pdf file at that size. On the high end, Adobe InDesign is the main choice. But, you can also use MS-Word, Apple Pages or even PowerPoint depending on what kind of book you are publishing. Many sites like Lulu.com and BookBaby.com also have on-line book and cover building options along with design and layout packages that you can purchase.
Whether you are using InDesign, MS-Word, PowerPoint, Apple Pages or something else you start by setting up your document to the trim size of your book. Something like, 6” x 9”. Set up a ½” margin all around and you are ready to go. My preference for creating a book is using InDesign, but if your book is mostly text, like a novel then MS-Word can work just fine.
Most of the specs and instructions are here on the Publish a Trade Paperback page on KDP.Amazon.com. You will see tabs for covers, interior, printing options, royalties, etc.
InDesign from Adobe is the top page layout software that you now rent for a reasonable monthly price. MS-Word probably already exists on your PC. If your book is a children’s book, picture book or coloring book you can easily use PowerPoint.
You start by setting up a new document with the correct margins. Then dropping in the text, add photos, if you are using them, and then on to design, layout and proofing. I have vastly simplified this process but creating a published book is very doable. There are also on-line training and plenty of freelance designers to help you with your project.
Photos for print are required to be 300dpi or dots per inch. This is the resolution of a hi-resolution image. Books are black and white or color. Any interior color and the entire book are considered color for printing purposes.

Creating Your KDP Book Cover
Creating a KDP print book cover can be a tricky thing to get correct. There are plenty of freelance graphic designers to help you create your cover. KDP covers are set up as a full spread with a back cover + spine + front cover + .125” bleed all around. KDP also has an online Cover Creator feature that you can use to build your cover. It does a decent job and can be a good, quick alternative to designing and laying out a cover.

InDesign book cover layout for KDP. Example (left) shows a layout for a 140 page, 6” x 9” Book. Includes 1/8” or .125” bleeds all sides. Overall cover file size = 12.558” wide x 9.25” high. The back and front covers are 6.125” x 9.25”. The bleed is .125” or 1/8” all the way around and will be trimmed off by KDP during printing. The spine is .308” thick. The spine is based on how many pages there are in the book. Your artwork needs to run right to the outer edge so that is can bleed off. Artwork should be 300dpi or vector.
If your book is over 100 pages you can add your title and author on the spine. If you are using the KDP Cover Creator you will need to have a minimum of 131 pages.

Paper thickness for calculating your spine
White Paper Black & White Interior .002252” ppi
Cream Paper Black & White Interior .0025” ppi
White Paper Color Interior .002347” ppi
Once complete, export your InDesign file as a PDF and send to KDP
• Go to File > Export > Select PDF Print, hit Save.
• In the next menu choose High Quality Print, hit Export
Can My Images Bleed Off the Page?
Yes, they can. This is a common question especially with children’s book authors. They want the images to bleed off the edge. Bleeding your images off the page means, when designing your book, it is necessary to give the printer enough extra image to trim it cleanly. KDP allows you to set up books for bleed but it is a little tricky. The pages have to have an extra 1/8” on the three outside edges. My recommendation for your first book is to not do this. Get a first book up and published and learn all the steps. Then work on creating a book with bleeds. It can get confusing.
There are many ways to publish your book, but I highly recommend putting it up on Amazon as a print book using KDP.com or an e-book through their Kindle program. It becomes a real book that people can find, order, and read it.
KDP also has excellent author prices if you want to order your book in bulk. If you speak or run workshops this is a great way to print and manage outside sales of your book. You can sell copies of your book from the room you are set up in, or make it part of a workshop package.
Resources:
• KDPd.Amazon.com Publishing Info, KDP has an excellent pdf on creating your book, click on the Overview tab to download the KDP PDF Submission Specifications,
• Adobe Creative Cloud, Includes InDesign, Photoshop and Illustrator, my favorite tools for creating books. They have different packages that you can rent. http://www.adobe.com/creativecloud.html
BUY: The Self-Publishing Manual, Create Your Own Print and e-Book
• Paperback Version
• Kindle eBook Version
BUY: The Self-Publishing Manual, Create Your Own Print and e-Book
• Paperback Version
• Kindle eBook Version
9. Creating a Quick Print Book
I added this in here because sometimes you want to create a nice, simple, little book like a business FAQ handout or a church fair recipe book, something like that. You do not have to go to Amazon to publish it. I have seen small businesses create a simple handout booklet as a lead magnet to help close a deal or to inform customers of their services, sales, even coupons. Does your competitor have a book? A Quick Print Book is a great way to get your customers up to speed to what is happening within your business and answer some key questions. Later on, this booklet can be expanded to a full published book, but this can be a good beginning step.
These books are usually half of a sheet of regular size 8.5” x 11” paper turned sideways and folded to 5.5” x 8.5” in size. They can be in color or black and white. Covers are usually just cover stock and the binding is usually staples or they could also be spiral binding. In Europe A5 is one half of a standard A4 paper size. These are easy and cheap to get printed at a quickie print or copy shop or an office supply store like Staples or OfficeMax for those first copies.
You will want your page count to be a unit of 4. Something like 8, 12, 16, 20 to 24 pages works very well. 16 pages is a common size. Larger than 24 then you will need to start thinking about creating a full-on book and publishing it on Amazon.
MS-Word can work very well for creating this kind of book. Go into Page Setup and change the page size to 5.5” x 8.5” with 1/2 margins. Think about adding a header at the top with the book name and in the footer, add in page numbers and maybe your web address.
When done, save your file as a pdf and take it to your local quick printer or copy shop. The new copy machines can take the pdf and create a book for you.
Create Your Quick Print Cover
Quick print covers generally need to be set up as a full spread with the back and front cover, minus the spine. If you do not have access to Adobe InDesign, you can also create a very nice cover using PowerPoint. Set your page/slide size at 11” wide x 8.5” tall. You will find this in Page Setup in the File pull down menu. Assuming your book is in the 8-24-page range. Again, a local freelance designer can help out with your cover. Check with your local print shop, they will tell you what they need.
You can easily create this book yourself or get the help of a local graphic designer. This is a great way to start a book project, and get some feel for your book, and then later expand it to a full book and publish on Amazon.
Resource:
• Staples or OfficeMax, a good option for creating a short run version of your book, like 5.5” x 8.5” or 8.5” x 11” if you just need a few. Add a spiral binding or if under 24 pages a staple binding. https://www.staples.com/sbd/content/copyandprint/booklets.html
BUY: The Self-Publishing Manual, Create Your Own Print and e-Book
• Paperback Version
• Kindle eBook Version
BUY: The Self-Publishing Manual, Create Your Own Print and e-Book
• Paperback Version
• Kindle eBook Version
10. Publishing Your Book
Prepare your book files and upload them to the appropriate site for publishing. Below are the basics. The how to step-by-step details are more involved and can be found in each platform’s FAQ section or their downloadable manuals.
1. E-book
Two files are needed, the book’ inside pages saved in html and a cover saved as a jpg file. Upload both files to KDP Direct/Kindle/Amazon. Kindle KDP.amazon.com has detailed instructions in the help area on how to save your files. I also cover this in my Easy Kindle Books course in greater detail.
http://www.ThePublishingMasteryAcademy.com
One of the last tasks you do before saving your book as a html document is to create your books Table of Contents. For Kindle books, this is done at the end of the project. If you have used H1 Header Styles in Word, you will be able quickly create the TOC. On a PC, the links from the TOC to the Chapter heads happen automatically. On a Mac, you will need to use the hyperlink feature and manually make the links to make them clickable.
Resource:
• Kindle, the main e-book site, and e-book reader, free, https://kdp.amazon.com
• Barnes & Noble Press, https://press.barnesandnoble.com/
• Smashwords.com, distributes e-books to over 80 outlets and devices, free, https://www.smashwords.com/
• Draft 2 Digital.com, free, https://www.draft2digital.com/
2. A Print Book
Upload your book files to KDP.Amazon.com. KDP.Amazon.com requires two high-resolution pdf files, one for the interior and the other for the cover. Your cover file needs to be a complete cover spread with the back cover, a spine (set up for the number of pages), a front cover and bleeds all around. For the interior just export your cover in PDF from your application. KDP also has a Cover Creator option that you can use to make a cover if you are not able to create one using InDesign, Illustrator or PowerPoint. The Cover Creator works pretty well but doesn’t allow as much control over your layout as you would have if you use something like InDesign.
If you want to be in book stores and in the distribution system, or hardcover then look at IngramSpark.com for publishing your book. They are a print-on-demand printer and the world’s largest book distributor. I do not recommend starting with them though. They work best if you have some experience with publishing books. You are acting a little more like a publisher when you are using them. They do have some fees
I also recommend taking a look at Lulu.com. Lulu is a print-on-demand publisher like KDP and IngramSpark. It kind of falls in between these two. It offers a lot of binding options including spiral and saddle-stitching (staples). It also has several distribution options including: Amazon, Barnes & Noble and Ingram. They are free to use.
For starting out and a great experience I choose KDP.Amazon.com. It is part of Amazon, has a great product and very easy to deal with. Once you know more and have some experience then you can check out the others.
Resources:
• KDP.Amazon.com, division of Amazon.com, the number one print-on-demand site, https://kdp.amazon.com/en_US/
• IngramSpark.com, if you want to be in bookstores, go here, http://www.ingramspark.com/
• Lulu.com, similar to KDP but with more printing options, paperback, hardcover, spiral, saddle, free, https://www.lulu.com/
3. A Quick Print Book
Usually, bound by staples or a coil or spiral binding. You will create two pdf files; the interior, which is usually done page by page with MS-Word or InDesign. For the interior of the book, set your page setup to 5.5” x 8.5”. And the cover, set up at 11” x 8.5” landscape. You can design your own covers or go through Fiverr.com, Canva.com or a local freelancer. PowerPoint also works pretty well for these projects. Create two pdf files and take them to a local quick print shop for printing. Instruct them to run the files out and staple them in order to create a booklet. The cover will be 8.5” x 11” landscape if your book is under 24 pages.
Resource:
• Staples or OfficeMax, a good option for creating a short run version of your book, like 5.5” x 8.5” or 8.5” x 11” if you just need a few. Add a spiral binding or if under 24 pages a staple binding. https://www.staples.com/sbd/content/copyandprint/booklets.html
• Your local copy or print shop
4. PDF Book
For your PDF book, you will use just the front cover from one of the above formats. If you have access to Adobe Acrobat, you will be able to insert a PDF of the cover into your book document. If you do not have Adobe Acrobat then I recommend creating a cover as the first page of your document. But you should be able to insert a cover into your document. You can create your PDF by going to the Print menu and selecting PDF as your printing option. Create the file and you are ready to go. You can distribute your book on your web site, through your email manager or sell on a site like Gumroad.com or Sellfy.com.
Resources:
Web sites you can sell your PDF book from. Host the PDF here and link it to your site.
• Gumroad.com, https://gumroad.com/ place to sell your PDF book
• Sellfy.com, https://sellfy.com/ place to sell your PDF book
• There are many others
5. IngramSpark.com the Bookstore Route
If you are going the bookstore route (which I do not advise when first starting out) then you will need to download their PDF specifications. Creating your book is going to be very similar to CreateSpace but the key difference is that the image files need to be in CMYK and 300dpi. This process is referred to as a four-color process in the printing world. You will also need a final pdf interior book file.
For the book cover file, you will need have an IngramSpark account, a correct ISBN number, the page count and then create and download a cover template. The cover templates are in PDF or InDesign format. The Cover Template Generator is located in the Help Menu > Tools > Cover Template Generator. Once you have built your cover in InDesign you will save it in PDF/X-1a:2001 format and upload it to IngramSpark.
Resource:
• IngramSpark.com, http://www.ingramspark.com/
Add Your Metadata for Each Book
If you are publishing your e-book through Kindle/Amazon or your print book through CreateSpace/Amazon, or Ingram, you will need to upload the two pdf files and then add all the metadata. Metadata is the description, author bio, categories, keywords and pricing.
A. Set up your free accounts at Amazon, Kindle KDP.amazon.com, KDP.Amazon.com
B. Upload your book files to Kindle/Amazon or KDP.Amazon
C. Fill in all of the description copy, pricing, categories, bio, keywords, etc.
D. Review the uploaded books using the Amazon proofing features.
E. If ok, push the book live on Kindle. You are Published!!!
Because of KDP.Amazon and print-on-demand technology only books that have sold will get printed, packed and shipped. You do not have to do anything, no need for a garage full of books. For Kindle, electronic files of the book are delivered to an e-book reader right after someone purchases it.
If you are going the quick print direction just print what you need when you need it. When I have used this option, I have printed as low as 5-10 copies and maybe up to 30 at a time. The goal is no garage full of books. Give them away to your customers.
Remember, also, that KDP.Amazon can print bulk orders of your book. Their pricing is excellent and it is a great way to have a high-quality book to give away or sell locally.
BUY: The Self-Publishing Manual, Create Your Own Print and e-Book
• Paperback Version
• Kindle eBook Version
BUY: The Self-Publishing Manual, Create Your Own Print and e-Book
• Paperback Version
• Kindle eBook Version
11. Launch, Market and Sell Your Book
It is time to get your book out into the world. Use your platform and all your connections to highlight and showcase your book, let people know it is published. Launch and market your book through the popular social media channels; Facebook, LinkedIn, Twitter, Pinterest, your website, your email list, and YouTube. Be sure to include a live web link from your posts back to the Amazon sales page so people can buy your book.
A. One of the first things I recommend is to pull together a media kit with all the graphic assets you will need to promote your book. JPG images of your book cover, your headshot, a good book, and author description, maybe a book trailer video for YouTube and your blog. Be sure you have a physical copy of the paperback version to hold up in photos and on-line.
B. Announce and launch your book through all the social media channels you are connected to. Your Facebook Page, your author/book web page or blog is a great place to start. Look for local media in your community newspaper; they love it when a home town author releases a new book story. Update all your bios on all your social media sites. Create an event around the launch.
C. Give your book out to current and potential customers. Books make great calling cards. People don’t throw them away. Make sure your contact info is in the back of your book. Make it easy for people to find you.
D. Hopefully, you have some kind of web presence like a blog or website. If so then announce your book on your website with a direct link to Amazon so readers can buy your book from your websites. Add a thumbnail of the cover.
Your book’s content can be used to create excellent blog posts and videos. Be sure to include Calls to Action (CTA) buttons, sales line or a short bio line with a link at the bottom of each post to drive traffic to the book’s sales page on Amazon. Let Google help spread your message. Basically, wrap ads for your own book around your own content with links to Amazon.
E. All Amazon authors are eligible to join the free Amazon Author Central. This is your author's home on Amazon. Add a bio (your Kindle author bio is your Amazon Author Central bio), connect your book, connect your blog, upload pictures, and videos. https://authorcentral.amazon.com/
F. If you have a blog or website, set up a sign-up box to gather email names. Using a service like AWeber.com or MailChimp.com, you can set up an auto-responder series that sends out emails with some of your book’s content and links to the book sales page on Amazon. Save your new book into chapters as PDFs and send out a series of emails with them attached. Think of it like an online mini course.
G. Update all of your on-line and off-line bios with your new book. Anywhere you have a bio add something like this; Mary Smith, author of My Great New Book, is the sales manager of . . .(fill in the blank). Be sure to add where you can purchase the book and add a live web link if possible. Example: Available at Amazon.com, something like that.
Look at your profiles on LinkedIn, Facebook, your company website, your own website, Twitter, Pinterest, your company brochure, any organizations you belong to and anywhere else you might be.
H. Run a Best-seller launch campaign, read Making an Amazon Best-seller on page 104 in the Bonus section, on launching your book.
Resource:
• AWeber.com, https://www.aweber.com/
• MailChimp.com, https://mailchimp.com/
There are many companies you can use to manage your email list.
• I go into much great detail in my book, Book Marketing Checklist for Self-Publishers, Available at Amazon.com https://www.amazon.com/Book-Marketing-Checklist-Self-Publishers-Complete-ebook/dp/B01CJ9K4F0
BUY: The Self-Publishing Manual, Create Your Own Print and e-Book
• Paperback Version
• Kindle eBook Version
BUY: The Self-Publishing Manual, Create Your Own Print and e-Book
• Paperback Version
• Kindle eBook Version
12. Re-Purposing Your Book Content for Additional Products
You have made your book, now what? What do I do with it? How do I make money from it? Your book is just the beginning. Along with the general marketing you are doing to promote and sell your book, you can also re-purpose it into other products and services. Create it once and use it over and over for different products.
Take the PDF file you created for your book, how about selling it on your website. It doesn’t have to be just Amazon and it doesn’t have to be just a book. You can take the pdf and create a digital product with it, maybe add a couple of videos, or an audio or add a workbook and you can charge way more than what a book sells for.
Book Content Can be Turned into Any One of the
Following Products:
• Physical Book from an e-book
• E-Book/Kindle form a physical book on CreateSpace or Kindle print
• PDF book
• Workbook, journals, worksheets, workbooks can sell for many times what a book sells for
• Audio recording of the book, mp3, Look at ACX.com and Audible.com, audio side of Amazon. http://www.acx.com
• Audio program or course built around the book
• PowerPoint presentations
• Record the PowerPoint presentation and make a video, preview on YouTube
• Annotated versions
• Webinar. Use some of these other products as a bonus or sell Seminars
• YouTube/Google Hangout, Facebook Live, Zoom, Skype interviews with other authors or experts to discuss the book or topics. These videos can be used all over the web for promotion and additional products. Transcribe and make additional books and product.
• Interviews and guest blog posts around your topic
• Video training courses around your topic. Each chapter becomes a video
• Cheat sheets, assessments, how-to sheets
• Take the illustrations and make a picture book
• Take the illustrations and use the art on sites such as CafePress.com, Printful.com and Zazzle.com for products like t-shirts, mugs, clocks, pillows, etc.
• Use as content to start a monthly membership site or newsletter
• Resell the content for Private Label Rights
• Book content can easily become blog posts or podcasts
• Build a resource list to go with the book, readers love resource lists
• Build affiliate offers into your list

Resources: Sites to Use for Creating Additional Products
Gift and Apparel Producers. On Demand Manufacturing
• CafePress.com, http://www.cafepress.com
• Zazzle.com, http://www.zazzle.com
• Spreadshirt.com, http://www.spreadshirt.com/
• Printfection.com, http://www.printfection.com
• Printful.com, https://www.printful.com/
• Redbubble.com, https://www.redbubble.com/
Sites for Product Fulfillment
• Disk.com, single source for printing, manufacturing and fulfillment http://www.disk.com/
Sites for Creating Physical Audio, Video, and Print-On Demand Products
• Speaker Fulfillment Services.com http://speakerfulfillmentservices.com/
• ACX.com and Audible.com, the audio side of Amazon. http://www.acx.com
Take the artwork from the book and resell on sites like Printful.com, Zazzel.com, Cafepress.com and many more. Turn it into mugs, hats, t-shirts, clocks, pillows, the list goes on and on.
Resources: Creating Products, Hats, Mugs, Posters, T-shirts, etc.
• CafePress.com, http://www.cafepress.com/
• Printful.com, https://www.printful.com/
• Redbubble.com, https://www.redbubble.com/
• Zazzle.com, excellent for posters and products, https://www.zazzle.com/
Resources: Sites for Selling these New Products
Each of the sites listed below have a way of setting up an on-line shop to sell your new products
• Gumroad.com for digital products, https://gumroad.com/
• Sellfy.com for digital products, https://sellfy.com/
• eachable.com for courses, https://teachable.com/
• Udemy.com for courses, https://www.udemy.com/
This list can go on and on.
BUY: The Self-Publishing Manual, Create Your Own Print and e-Book
• Paperback Version
• Kindle eBook Version
BUY: The Self-Publishing Manual, Create Your Own Print and e-Book
• Paperback Version
• Kindle eBook Version
* * * BONUS SECTION * * *
How to Make an Amazon Best Selling Book
The theory for producing a best-selling book is to drive as many people as you can to buy your book through the narrowest time frame in a book category that doesn’t have very many books in it. You also want to pick a category that doesn’t have a popular best-selling author or big selling book at the top that you have to take on.
This is why building your platform is important; you need fans to do this. If you can do this, it is very likely that you can create a short lived bestselling book. Maybe even a #1 category best-seller. It won’t last long so be sure to screen capture the Products Details area of the Amazon sales page for your marketing. Generally, this technique works best with Kindle books because you can lower the price down to $.99. But I have also seen it work with paperback books but the per book price will be much higher and it is harder to get that impulse purchase when running a best-seller campaing.
Step 1. Research Your Categories.
• Look at your competitor’s books for category ideas
• Select specific book categories that have under 5,000-7,000 books in them, better if you can find one with low thousands or even hundreds of books.
• Try to find a category that doesn’t have books in the top 2,000-5,000 overall Amazon sales rank. Also look for categories that don’t have a superstar writer or celebrity at the top. It is almost impossible to beat them, look for different categories.
• When you upload your book, select the BASAC book categories as close as you can to the Amazon categories. Be sure to include in your description and keywords and even your title/subtitle the Amazon categories that you want to be in. You are helping Amazon figure out where your book should sit.
Step 2. Pre-Launch Your Book
Remember the goal here is to drive as many sales as you can through the narrowest time frame with as many people as you can.
• Prepare and send out your launch announcement or any articles that you might be releasing to your Blog and Influencers network.
• Send press releases out to PR sites free and paid.
• Try to build a street team around your book launch. These are fans that you have that support you and will buy the first copies and post though out their networks. This can be huge, even just a couple of people can make a huge difference.
• Set up a virtual book tour. A virtual book tour are articles and interviews that you have created about you and your book that are hosted on other people’s blogs and websites. Start early and build these relationships.
• E-mail your list that you are launching your book and would love to have their support. Give them the book link and instructions on when to buy.
• Lower your Kindle price to $.99. Have a few friends buy a copy of the book and write several positive reviews. You want to make sure everything is working sales wise. It is ok to have the book live, just keep it quiet.
• If released over CreateSpace lower your price as much as you can.
Step 3. Launch/Release Your Book.
Remember to create a best-selling Amazon category book you want to drive as many people as you can to buy your book through the narrowest time frame in a book category that doesn’t have very many books in it.
• Announce your book is live on your social media sites, include a cover shot and the link to Amazon.com.
• E-mail your list that your book is now live.
• Announce your book is live on your blog, websites, make a book trailer video and host on YouTube and all your sites. Any and every place you have exposure to the world, announce your book is live.
• Get your street team announcing that your book is live through all their social media sites with live links for the book to Amazon.
• If you are giving away a free bonus gift tell everyone how to get it.
• Conduct a Virtual Launch Party on Facebook Live or YouTube/Google Hangout.
• Release your Virtual Book launch and tour.
• This is key, post your progress in your social media accounts during the launch day about what is going on, how exciting it is. Make it an event. Encourage others to join in, get your fans involved to get you over the top to a #1 position on Amazon.
• Be sure to screen capture your Amazon ranking as you climb, don’t try to guess the top, just keep recording the screen during the day. This information is located in the Product Details section of your Amazon book sales page.
• Amazon updates on an hourly basis but sometimes nothing happens for hours and then it starts to roll, you will have to pay attention for 24 hours. Having a few fans in other time zones can really help out with the watching.
Step 4. Re-Release/Announce the Book Release at the End of The Day
• Re-e-mail your list and repost in Social Media about your launch, be sure to not burn out this list.
• You can push books over the top during the night by letting readers know how close you are to #1.
• Watch what is happening the next day, some countries take a day or so to catch up to the #1 ranking.
• International best sellers can be done with as few as 3-5 book sales, build relationships with fans in other countries. This turns you into an International Best Seller.
• Remember to check your rankings and screen capture, #1s and Hot New Releases
Step 5. Thank Everyone for All the Support
• Thank everyone for the support and help. Especially thank your super fans and anyone that reposted through their networks for you.
• Update all your bios about your new best-selling #1 status.
• Post the screen shots of the new rankings and the success. You will be surprised; people will still be buying. People like success.
• Have your book cover updated with a best-selling burst or banner.
How I Launched My Book to Amazon International Best Seller
Want to launch your book to an International Best Seller like I did, check out my course on How to Market Your Book. In fact, you can download my detailed case study with examples for free and learn what I did to get my first best seller. Just scroll down to the Class Curriculum after clicking this link and download the pdf. How to Market your Book, Click Here
Case Study, How I Launched My Book Marketing Check List to #1 International Best Seller: Overview, for more details click the link above
How I Launched My Book Marketing Checklist Book to #1 International Best Seller
Step 1: Pre-Launch: Write Out Your Launch Plan
Step 2: Pre-Launch: pick categories and keywords for your book.
Step 3: Pre-Lunch, make sure your book is live on Amazon and can be purchased, buy a copy.
Step 4: Pre-Launch: Prepare a media kit with launch graphics; cover shots, author head shots, text and links to your Amazon book sales page.
Step 5: Pre-Launch: Research some other book launches and their descriptive text for inspiration on how to write yours. Google “recent book launches.”
Step 6: Pre-Launch: Set up a MS Word document with your description text and links to Amazon.
Step 7: 9:00am Launch: Release your new book, we begin.
Step 8: Launch: Post your book launch notices everywhere you can.
Step 9: Launch: Thank your fans for buying your book, build social proof.
Step 10: Launch: Record your progress on Amazon rankings with screenshots.
Step 11: Launch: Continue to post updates during the day, post screenshots of any progress on Amazon in your social media sites.
Step 12: Launch: In the evening do another round of launch notices. Encourage people to push you over the top.
Step 13: Launch: Be sure to screen capture all results. The rankings don’t last that long on Amazon. You will need these for marketing.
Step 14: Post-Launch: Thank your fans again for their support. Post the results of how high you got in the rankings. Did you get bestseller?
Step 15: Post-launch: Update all your bios with your new best seller status.
* * * BONUS SECTION * * *
Top Ten Technique for Writing a Business Book
Do you want to spread your message? Do you want to be seen as the authority on your topic? Do you want potential customers to pay more attention to you? The answer is Yes. How do we do this? We do it with a book. Books are the new calling cards. People treat books with reverence. Books position you as the authority and expert in your topic. Books make fantastic marketing tools. Books get opened and saved. Books also give you something to anchor yourself to. You can refer to them in your marketing and in your presentations. They make great gifts to a new or current customer. People don't throw them away. It is so easy to create and publish a book these days that you can easy be a published author in no time.
In this article we will be using the lessons you have learned in your career and business and now want to pass on or share to your employees or customers. A great way to do this is to create a book which makes for a great leave behind, introduction to what you do or lead magnet for your business. Treat it as if it is your business card. This book is simple for you to make and easy to produce. To do this we will use a technique I have developed called the Top Ten Tips Technique for Creating a Book. The series below takes you through all the steps from creation to publishing to marketing.
Sections 1-4: The Top Ten Tips Technique for creating your book
Section 5: Getting your book designed, edited and formatted
Section 6: Choosing where you are going to publish
Sections 7-8: Formatting and layout of your, Kindle, CreateSpace/paperback, or Quick Print book
Section 9: Uploading to Amazon or quick printing for publishing
Section 10: Marketing with your book
How and Why Do I Want a Book for My Business, How Do I Use It?
Your book establishes your authority and expertise in your market. You are not writing your book to make money from royalties, though that is nice if it happens, you make money by giving it away to potential clients. Your book becomes your new business card.
• Your book and the title focuses on what you do.
• You are an author not a writer, we are doing this quickly
• Make your book is logical and instructive, this isn't a legacy
• Your book centralizes your ideas, the table of contents are the benefits your bring to the table
• Your book is a gateway to your products and services, these are called your backend
• Your book's content can also be used for additional products, videos, podcasts, blog content
• Your book is a call to action for your current and potential clients
The Top Ten Tips Technique to Write and Publish a Book
In ther sections below I take you through an overview of the steps needed to create your business book. This section is the quick read.
1. Write down the 10 best tips or lessons on or about your business, or your expertise. Keep these to one or two sentences each. #1 is your best then follow with 9 more.
2. Write out one paragraph for each tip or lesson, just one paragraph.
3. For each lesson expand that 1 paragraph to 3-4 paragraphs, flush out the concepts.
3B. Add an author bio along with a photo and contact info at the back of the book. Add a resource list at the back of the book, an intro for the front, a table of contents and any additional info that might apply to your book. If you offer programs or consulting, drop that in also, give readers a call to action. We are talking 28-36 pages when done. This isn't a manifesto.
4. Have your book edited and proofed. After your book is formatted and laid out have it printed out for review and re-edit again. You will be amazed what you see in a printed version of your book.
5. Print out a Pre-Edited Proof of your book, at the correct size and bind it with a spiral binding. This will give you an excellent sample of your bookl
6. Select a format for publishing your book. E-book on Kindle, print book on CreateSpace.com/Amazon or using a quick print shop
7. Create a Kindle e-book and cover
Format the insides of your book in MS Word or some similar word processing application such as Google Doc, Pages, or Scrivner for Kindle. Just work with the regular document and keep the formatting simple. For an ebook/Kindle, create the front cover using Canva.com, InDesign or the online Kindle Cover Creator and save it as a jpg. I have found 6” x 9” at 300dpi can work very well.
8. Create a KDP print book and cover
Using Adobe InDesign or MS Word set up your book page at 5.5” x 8.5” or 6” x 9” with ½” margins. Format your MS Word document in InDesign or in Word, add images and publish your book through KDP.Amazon.com. For a printed book on KDP, set up a full cover spread with the back, spine and front covers plus a 1/8” bleed all around. Your book needs to have a minum of 24 pages. Try for 36 pages and you will do fine. KDP also has an online Cover Creator that can simplify the cover layout.
9. Create a Quick Print book and cover
For quick print books that you create though a local copy shop or Staples, set your page size up at 5 ½” x 8 ½”. This is an easy size to get printed at a quickie print shop. If you have access to Adobe InDesign that also works very well for creating a printed book. A local designer can help with this stage. Your PDF book is created from any of your source files. If you are using a local quick print shop like Staples you can leave out the spine. Set your cover spread up with back cover and front cover at 8.5” x 11”.
10. Uploading and publishing your book. If sending your book to Kindle then save it as an html file for the web. If you are going to print, export or save as a pdf file. Also export your cover file. Upload your book files to Kindle for ebook, or KDP.Amazon.com print, KDP is also the print-on-demand, self-publishing side of Amazon.com, or take the two pdf files to a local quick print shop. If hosting on-line at Amazon, add descriptions, author bio, categories, keywords and price. Kindle has cover creator applications for ebook and print.
11. Launch and market your book though the popular social media channels; FaceBook, Linkedin, Twitter, Pinterest, your website, your email list and YouTube. The chapters can make great videos and blog posts. Give it out to potential and current customers. Make the book available on your website as a free or paid pdf download. Add a thumbnail of the cover and add a link to Amazon for purchasing.
12. Re-Purpose your book content. Your Top Ten Book will make great blog and video content for your website. Each chapter is a blog post or a video. The script has been written. Take your chapter and it becomes the description for your YouTube video. Take each chapter, add some questions with lines for writing and you have a workbook for a seminar or workshop. Take each chapter and turn them into a short video course. Publish the workbook on KDP and reference the videos. As you can see you can do all kinds of things with this content.
Top Ten Tips Technique in Detail
1. Write Down the 10 Best Tips or Lessons on or About Your Business or Expertise
Write down the 10 best tips or lessons on or about your business, or your expertise. Keep these to one or two sentences each. #1 is your best then follow with 9 more.A. Write down your #1 best business or experience tip or lesson. If you are working on an autobiography type of book, it might be the top defining moments in your life.
Or, carry a small notebook or folded paper in your pocket and write every question you get asked for the next month or so. Don't edit them, just write them down. At the end of the month compile them and pull out the top most popular. Your Number 1 question is what your book is about, the other 9 are the other chapters.
B. Now write down nine additional lessons. Keep these to a sentence or two. No paragraphs just the lessons.
C. Use the Google Top Ten tips in search technique, Amazon Book Table of Contents or the Book Review technique to find and flush out your ideas.
These are the main tips or lessons or questions about your experience or expertise that you want to pass on to the next person or might be useful to a customer. This is the core of your book. This first pass is a quick exercise. You most likely know all of these right off the top of your head. I usually start this process by asking, “what is your number 1 tip?” Don’t do a lot of thinking on this, just write down your number 1 tip. Ok now write 9 more and you are done. You can always change these later, but these tips are usually the things you tell people all the time.
Tips to come up with your list
Collect customer comments over a period of time. This is a great way to pull together a list of a Frequently Asked Questions that can be converted into a book for your business. Look for the common questions and summarize them.
• The #1 question you are asked and then 9 more, this is the most powerful.
• The FAQs or questions that you know people should ask.
• A process or step-by-step flow of something, step one, step two, like this article.
• Lessons you have learned over your life, legacy, life tips.
• Major points and transitions in your life, great for an autobiography.
Google the phrase, Top 10 Tips on XYZ, with XYZ being your subject. You will have a good list of search results that you can use to fill in your own list.
Using the Amazon Look Inside feature you can easily look through similar books on your topic. Look at the Table of Contents for additional tips and ideas. Add in some ideas from the Book Reviews and you can create a business lessons book pretty quickly. Amazon book reviews is where the gold sits, look at 5 star and 1 star.
Making a How-To Book, photograph the steps for completing a process, write captions and longer descriptions, add your bio and any additional info and you have a book.
2. Write Out One Paragraph for Each Tip or Lesson, Just One Paragraph
A. Write one paragraph for each tip, not two, just one.
B. We are not concerned with editing here, just writing out the paragraph.
C. Use some of the sites that you used to find your ideas, to flush them out to full paragraphs.
This is a key part of the process of creating your Tips book. For step two just write out one paragraph based on the tip or question. In step three we will expand it but the goal here is just get down some expanded ideas. The tendency at this stage is to start writing out the entire book, don’t do this. It is pretty easy to get bogged down and never complete it. We want to keep everything moving. So just one paragraph.
Writing Tips
This is a good step to also look at the sites you pulled up yesterday on Google from the 10 Ten Tips search. If you are a little low on ideas, see what others have written. You should be able to write at least a paragraph.
3. For Each Lesson Expand the 1 Paragraph to 3-5 paragraphs, Flush Out the Concepts
A. Expand each lesson to 3 or 5 paragraphs
B. Again no editing, just writing
C. The cooking timer method can be very effective here for getting done text.
In Step 3 we fill out each of the 10 lessons. Write 3 or 5 paragraphs for each one. Personal stories and experiences can add a great edition to your book. We go deeper. We aren’t writing a manifesto but quick lessons about our topic. We want our reader to come away with some great actionable lessons based on our experience.
Writing Tips
Use the cooking timer method. Set the timer for 10 minutes and just write with no editing. You cannot stop until the time goes off. No correcting, no editing, no stopping. If you don’t have anything to write, start writing gibberish until something pops in. Write today, edit tomorrow.
Again searching on top 10 tips on our topic is a great way to flush out our lessons. YouTube videos, related blogs and books. Look at the book’s reviews, remember we are looking for experience lessons here. Amazon book reviews are an excellent way to see what other books on our topic might have missed or subject that need to be included.
3B. Flush Out the Balance of the Book, Author Bio, Resources, Services
The general structure of a book
Even page number = left hand page, Odd page number = right hand page
Page 1. Title Page, repeats what is on the front cover
Page 2. Your legal and disclaimer information, including your copyright info.
Written © Copyright, J. Bruce Jones 2018
Page 3. Table of contents, be descriptive
Page 4. Good place for intro, or acknowledgements, front matter content
Page 5. Chapter 1 and you begin your book
Back of the book. Author Bio, products and services, resources, index, additional info.
Kindle e-books do not have page numbers, print books do
Add an author bio along with a photo and contact info at the back of the book. Add a resource list at the back of the book, an intro for the front, a table of contents and any additional info that might apply to your book. If you offer programs or consulting, drop that in also, give readers a call to action. We are talking 28-36 pages when done. This isn't a manifesto.
A. Add your author bio including photo, contact info, resources, introduction, front matter, table of contents (the 10 points), legal info, copyright, title page.
B. Add in any products, consulting, programs, or additional info that your reader might find useful. Add in back cover copy
C. Add in your book title and subtitle, make this one of the last thing you do. Don’t fall in love with the working title.
How long should this book be? This isn’t a manifesto but here are some guidelines.
• Kindle/Amazon e-book shoot for around 8,000-12-15,000 words.
• KDP.Amazon.com, you need to be a minimum of 24 pages, 36 works pretty nicely and 50-70 pages makes for a decent size book. These are quick books, you can certainly expand and go for more.
• A quick print book, local printer kind of book, your book needs to fit into a unit of 4 so 24, 28, 32 pages, etc. But even 8 or 12 can work very nicely as a quick print book that you can give away.
If you are a consultant, a tips book can be an essential part of your marketing. In the back highlight your programs and services. Make this section very clear so readers can find it. Add in a nice photograph and be sure to have a Call to Action to your website or maybe a pdf down load or video series. It can be YouTube. You want your reader to do something, contact you, hire you, invite you to speak at an event, or just make things clearer. The goal of a book like this isn’t for big sales, though that might be nice. The goal is to support your marketing and help develop leads. Customers love getting a free book, so be very open to giving them away. Sometimes you are selling this book, sometimes it is a free giveaway for signing up to your mailing list.
Go Back Up and Continue at Section 4. Editing Your Book

© Copyright J. Bruce Jones. 2022
No comments:
Post a Comment
Note: Only a member of this blog may post a comment.