I starting pulling together today the videos for my new course InDesign for Authors. Below is the intro video. I will be creating videos on how to use InDesign along with deeper dives on specific types of books such as; novels, children's books, cook books, non-fiction, journals and many more. The course will also include templates for each kind of book along with training videos.
Introduction to the InDesign Layout Window, Tools, Options and Panels from
Bruce Jones on
Vimeo.
Transcript from the video
Hi Bruce Jones, and welcome to this InDesign training video. I'm going to be talking today on a quick overview of the InDesign screen and platform. InDesign is the leading program for creating books and it's a part of the Adobe suite, along with Adobe Illustrator Photoshop. These three programs work together to give you a fantastic set of tools for creating publications, books, graphics, really anything that you want. InDesign is called a desktop publishing program. It allows you to bring together texts, graphics, illustrations, photos, all that kind of stuff into one central place and make a book out of it. In my newest book, I Want to Publish My Book But I Don't Know How, was done in InDesign. You can bring in photos, you can format all your texts, it's a really powerful program for creating anything in the graphics or publishing.

So why don't we just dig in a. I'm on a Mac, so some things may be a little bit different, but it's a cross platform program. So pretty much everything is the same. Files can go between the platforms. Some of the keyboard commands might be different as are a couple of things that are different, but basically it's the same. I'm just going to click on it to launch. This brings up a screen that has some of the projects that have I already been working on. You can see things in here that I'm working on. You can create new or you can open an existing file. So let's just create a new file and set up your document, set up your margins, set up your columns, all that kind of stuff.
In subsequent videos I'll show you how to bring in texts, how to bring in photos, how to format them, all that kind of stuff. But this video just covers the basic overview. So I'm going create new and you'll get a box on the screen that looks like this and it has a bunch of pre-made templates in here are. Especially if you've been doing a bunch of projects like you can see from mine. I have different sizes, those are all in here. I usually work in a unit of measurement called picas, which is right over here on the right. But I'm going to just change this to inches so you can see all the measurments. What's great about this product and Illustrator and Photoshop is that, you can work in many, many different systems, different color systems, different measurement systems. It's extremely versatile. The difference between them is photoshop is for photos and customizing your photos and getting them way you want to do it.
Illustrator is for making graphics, logos, charts, an illustrations. Then you combine those two applications along with something like Microsoft word for making your text. Bring it all together in InDesign to create your book. I am going to change the measurement to inches. I'm just going to set up the book at six by nine inches. So the width is six inches and make my height nine. You can put any number of pages to start. If you're working on a really big book, I usually recommend start with a basic number, maybe 20 or so, and then just keep adding as you, as you keep expanding your book. I'm going to just with one column to get started, but you can always change as you're going.
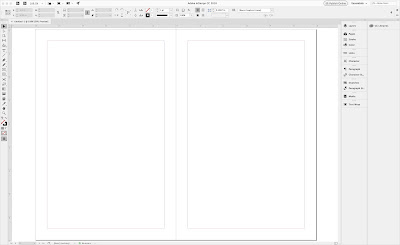
And up will come a new document. This is the way that it comes when you get it out of the package. I'm going to make a general settings change and I really recommend making this change for everybody. This is the basic screen and you notice it's all in black. On the Mac it's up Preferences, on the PC it is under the Edit menu, down here at the bottom of the menu. Go to preferences and interface and going to change.
We're going to un-click this setting so we can change the color theme from black to the white and I find this works way better for a number of reasons. One is it is easy to look at the options then when they are all black. But also this area out here, the paste board, so this is the way the page looks. It's ready to add text graphics boxes. All that kind of stuff can be added on here, but we also have the ability to move things and store them out here. And I find this really, really helpful that I can put this out here. I'll put text out here of format tit. I'll put extra graphics that I am not using it that moment because design is sort of a fluid process. So I really recommend that you make this change. It just gives you a lot more flexibility so it's just a little nicer to look at.
So. All right, let's just kind of walk around this screen. I'm just gonna show you basic things and that'll wrap up this video. On the left-hand side we have tools. These are all the basic tools you have, your pointer tools, your text tool, I'll be diving into these a little more on a some following videos and you don't need to know what all of these are, really just a few that you use the point. The text tool right here, the line tool, um, you might use the drawing tool. Maybe this is a gradient tool for doing a gradient. The hand tool right here, which you can grab and kind of move things around. Here is the magnifying glass down here, you have your colors and I'll talk about those in just a second of fills and strokes.
Those are the basic tools. You can also pull the menu out and move it around and they all kind of snap in. I like it. Depending on what tool you have clicked will determine what kind of options you have up here at the top bar. So you notice we can do some sizing things, we can line things up. If we draw a box, you'll notice a different things sort of options. Notice some more things opened up here and again, we'll dive into these later. But the point or tool allows all of these options to show up up here. So that's something you kind of work between these, these two things. The next one down that's important is the text tool. You notice a different set of options show up.
So let's do the text tool. You have all your type options. So your fonts, are all right there, the sizes of different things you can do with it. Flush, left centering and flush, right? So the alignments, different margins and indents and things. All the options right up here at the top for a quick access to it. Most of these options are also in the pull down menus. So we have character right there and we have character right here. So we have type faces. So many of the same things are located up here in these windows. So and then probably that's probably most of what you're gonna do. Oh, line tool hit the line tool. You'll notice you have all the line weights right here, the style of lines, that kind of thing. So you always want to look up at the top to see, here's what I want to do and here's how I can do it.
Over on the right we have another pallet as a series. These are a little more involved pallets than what's up at the top and also some of the same stuff. So let's say if I do the type tool, I can come over here to character pallet, I have access to my fonts. So nice little pop-up menus that comes out, pick sizes, leading, compression, all that kind of stuff is here. Same thing with the paragraphs alignment, you know, it's, it's up here and it's over here. So you guys wanna check out what's here. You have in this window, which has also, it can be pulled off. So if you just click hold and kind of drag it out, you'll notice it pops right out and you can move it around your keyboard. You're around your screen wherever you want to put it. You also have this little arrow that'll close it, but also there's a series of four little bars here and if you click on those bars at the other options, so it takes a while to learn all these different options.
This is a InDesign, it does have a learning curve to it. It's incredibly powerful program, incredibly flexible. You can design anything you want with it, but there is somewhat of a learning curve. We have hyphenation and drop caps, bullets all in the paragraph pallet. They're all in here and each one is different, so I could also just bring this back over to see how it changes color right there and it just goes right in. So I have layers will be doing will session on layers pages. Next is the pages pallet If I click on this pallet it shows up here, I can move things around all my master items, master pages, we'll talk about that. Very, very useful feature to set up master page of your patient numbers and headers and footers, that kind of stuff.
So all that's in here, you just have to kind of look and see what's there. Your strokes, that's the lines, connections, arrowheads, if doing arrowheads color, probably not use that so much, but you do use the Swatches pallet all the time. Here are your basic colors that come with the program and then you can add new colors, You only need a couple color families from the many that you can choose. rgb, cmyk, and pantone. You don't need to use all of these. So we'll kind of give some clarity to that. But you can assign new colors here.
Pick up a copy of my newest book,
Paragraph styles, paragraphs has a very popular or very powerful if you're doing a book with a lot of different things. So like in my book, I have had treatments that go through and if I wanted to make a change, I've styled all my heads with a certain style and if I wanted to make a change halfway through the project, I don't have to go back and change all of of them. I could just make one change in the whole project changes, so very powerful in this paragraph styles pallet. There is also character styles, but I usually just use the paragraph. There is also text wrapping for your wrapping text around a photo. You can do this kind of stuff. See this, put my picture in my book, wrap the tape around it. So that's text wrap. So that's kind of cool to be able to do.
Very easy to do and we'll talk about that. So this is the basic ones that generally comes with, but if I go into the Window pull down menu, here are all the different ones. So I'm around the outside. So you have tools on the left side, options up at the top. More options and tools and commands over here with. You have your page counter your page in the lower left, a guide. So I can jump from page to page so I can always just move my slider up and down to get to a different page, but I can also just go here and click on it.
So there's a multitude of ways to get places or I can go here to get to a page. So it just, it depends on which one you become comfortable with. You can pop between pages and that kind of stuff. Rulers running around the top very, very useful. And also guidelines right here in the rulers. I can also go up here and our margin lines. I can also go up here, click in my ruler and pull down a guide. Let's pull a guide down. Guides are extremely useful for lining things up, setting up areas on your pages you need to work with. That's the basic screen.
If you are serious about making books and making good quality books that have design and elements InDesign is the product in designers the product to you. So, all right, that's it for this video. This is just kind of an overview and look for other videos where I'll be diving into specific features. I'm getting texts in here, building your boxes, putting text to columns.
Connection and Learning
Bruce Jones is the author and creator of over 40 self-published books.
If you want to learn how to create your own book visit
Publishing Mastery 101 and see my courses:
https://bruce-the-book-guy.usefedora.com/
Come over and join my Facebook Publishing Group, ask me questions, show your books. Great place to connect with authors and self-publishers
Join at
https://www.facebook.com/groups/HowToPublishYourBook/


